What's New

Instagram

About Me

Photo Profile
Meetanshi Architecture Designer

Meetanshi is found based on providing the best Magento Extensions and Customized eCommerce Business Solutions perfected to the users’ needs. Our Happy users make us Happy. Complete satisfaction to our clients is what drives and motivates us to work hard. Read More

Showing posts with label Magento. Show all posts

Monday, January 2, 2023

How to Set Default Values for Magento 2 System Configuration

 Getting into the structure was just made more straightforward with the arrival of Magento 2.


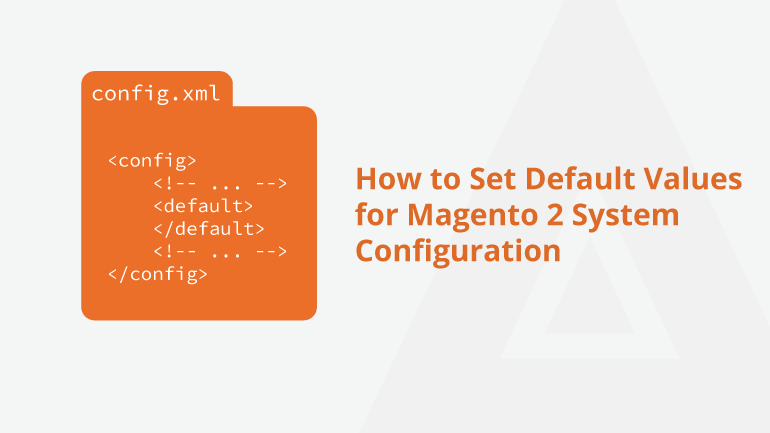
Allow me to let you know situation where you are conveying a Magento 2 exceptionally evolved module to a store shipper who is a Magento 2 beginner. For the expansion to function true to form, certain designs are intended to have specific qualities. In any case, the store dealer or administrator may not know about it or might not have a thought of which worth ought to be added to get the ideal result. To facilitate the design and stay away from void worth result, you can set default values Magento 2 system configuration.


By setting default values for Magento 2 framework setup, you guarantee that there will constantly be an intelligent worth returned for the design choice and not need to stress over an invalid or void result. When the augmentation is introduced, the Magento 2 framework design is set to the default values. It makes the undertaking of administrator/module client simpler.


in Magento 2, and a couple of extra assets would it be a good idea for you really want them. Presently it depends on you to get coding, or go to the remarks in the event that you might want to show up.


For more information , Visit : https://meetanshi.com/blog/set-default-values-for-magento-2-system-configuration


Sunday, January 1, 2023

How to Remove Column from Admin Grid Dynamically in Magento 2


The Magento 2 CMS enables admin users to modify the built-in functionality to make managing orders and customers and administering the Magento 2 store easier.


The administrator might, for instance, add a unique column to the products grid.


What happens, then, if an administrator in Magento 2 wants to dynamically remove a column from the admin grid?


In Magento 2, it is possible that adding a custom column to the admin grid is necessary when creating a custom module. Additionally, it would be desirable to eliminate that custom column whenever the custom module is disabled.


Use the following solution in that situation to remove a column from the admin grid dynamically in Magento 2.


For more information, Visit : https://meetanshi.com/blog/remove-column-from-admin-grid-dynamically-in-magento-2/


How to Update Column Datatype in Magento 2

Magento Designers… ! Is it safe to say that you are searching for ways of to update column datatype Magento 2.? Follow me till the finish of this post to track down the arrangement.


It's generally expected important to refresh information base tables while chipping away at module. We can have to add sections or update some of them.


In Magento 2 Some of the time we have added a segment/field in the table for our custom prerequisite and in future in the event that we want to rename or change that section name, we can rename it utilizing UpgradeSchema.php document.


Online stores gather a great deal of data in a hurry, and store them as segments in the data set. Magento 2 stores the data in various information types for proficient capacity and handling. A portion of the normal information types are: text, whole number, decimal, boolean, and so forth.


Yet, now and again the current information type may not be appropriate for putting away the data and you might require changing the segment information type in Magento 2. There can be numerous occasions .


For more information , visit : https://meetanshi.com/blog/update-column-datatype-in-magento-2/


Magento 2 API – Create Cart Price Rule


With another blog entry about the Magento 2 API, I'm back. Today, I'll demonstrate how to use the REST API to build a cart pricing rule in Magento 2.


One of the popular strategies used by online retailers to boost conversions, average order value, and eventually sales is to provide customers with tempting deals and discounts. By default, Magento 2 gives retailers the ability to set their own cart pricing rules, or criteria for differentiating discounts. Through the REST API, the client can create and manage cart price rules in Magento 2 thanks to the Magento 2 cart pricing rules API.


If you are establishing a brand-new admin panel, you must use the Magento 2 APIs to implement admin-level features like generating cart prices. I’ve shared how to create a cart price rule in Magento 2 API in this blog article.


For more information, Visit : https://meetanshi.com/blog/magento-2-api-create-cart-price-rule/


How to Create JQuery Autocomplete Text Box With Example

 The UI of online applications and web forms is given life by JavaScript.


Highly interactive web experiences may be made with JS, which is easier to do than just HTML and CSS. The jQuery UI library has many usable interactions, widgets, themes, effects, and utilities. The jQuery Autocomplete widget is one such helpful tool.


Consider how Google's autocompleting suggestions during an internet search might save you time.


You may incorporate comparable features in your online application or form with jQuery Autocomplete. Providing users with such capability can assist you:

  • Enhance the user experience

  • Lower the cognitive load

  • Prevent Typing Errors


The HTML elements textbox, textarea, and input are all compatible with the jQuery Autocomplete widget. Every time a user types something into the field, it is activated by a key-up event and displays autocomplete recommendations to the user.


To Create a JQuery Autocomplete Text Box With an Example, Visit, 

https://meetanshi.com/blog/jquery-autocomplete-text-box-with-example/


Thursday, December 29, 2022

How to Get Week Days List in Magento 2 System Configuration

 Numerous input kinds, including text boxes, radio buttons, dropdown menus, multi-select boxes, etc., are available in the Magento 2 admin panel. These fields' input values are saved and displayed in a variety of grids, forms, fields, pictures, etc.


Developers may need to offer the ability to select which days of the week to include or exclude from a module's functions when creating Magento 2 extensions or custom features.


For instance, the admin could choose which days of the week a consumer can make an appointment or which days the store would offer delivery.


The aforementioned technique is beneficial even if you want the store administrator to keep track of the days off in accordance with business needs.


In each of these scenarios, you must a get weekday list in Magento 2 system configuration.


For more information, Visit: https://meetanshi.com/blog/get-week-days-list-in-magento-2-system-configuration/


Wednesday, December 28, 2022

How to Get Customer by Email in Magento 2

An admin who is managing a Magento 2 store cannot ignore the need to maintain customer data.


The admin needs to obtain customer data in order to operate effectively on anything from marketing to customer service, delivery, and so forth.


For instance, you might wish to launch a marketing campaign targeted at a certain age group or incorporate validation based on consumer groupings.


In Magento 2, all of these actions necessitate obtaining client data.


In Magento 2, a client can typically be found using their ID. But if you don't have a customer ID, I'll show you how to get customers by Email Magento 2!


By just passing the customer's email address to the code below, you may obtain the customer's ID, first and last names, and other information about them.


For more information, Visit: https://meetanshi.com/blog/get-customer-by-email-in-magento-2/ 


How to Enable Merge CSS, Javascript in Magento 2

 Only those online retailers that can continue to provide the finest customer experience will be able to compete in today's industry.


The user experience now dominates store performance. There is no denying that one of Google's ranking variables is how quickly a page load.


Knowing how valuable even a single second maybe when it comes to the speed at which a website loads, one should take the time when trying to speed up a Magento 2 business.


And one method for doing so is to enable merging CSS, and javascript in Magento 2.


One of the causes of Magento 2's poor performance and lengthy loading times is the separation of CSS and javascript.


Merging removes pointless or redundant data, such as line breaks, from a resource without altering how the browser reads it. After integrating CSS and JavaScript, it restricts file alteration.


The store will load more quickly thanks to fewer calls made to the server due to the CSS and javascript merger.


And fortunately, the admin panel of our favorite CMS includes a default feature to enable the merging of CSS and javascript!


For more information, visit: https://meetanshi.com/blog/enable-merge-css-javascript-in-magento-2/


Monday, December 26, 2022

How to Add Custom Menu Item in Magento 2 Frontend

 A store's navigation menu makes it easier to move around the store from one place to another. It points website users in the right direction so they may quickly and easily find goods and services.


By default, when a category is added and its "Include in Menu" option is enabled, Magento 2 creates the menu link. But what if you need to add a custom menu item in the Magento 2 frontend instead of category links so that website visitors can find the link to a crucial page or form with ease?


For instance, you must display user information for customers who are logged in on the "My Profile" tab. You must add a custom menu item to the Magento 2 frontend so that clients may click it and view the profile information with ease.


For a detailed guide, Visit:  https://meetanshi.com/blog/add-custom-menu-item-in-magento-2-frontend/


How to Add Custom Field Below Apply Discount Code in Magento 2 Cart Page


The ability to customize Magento 2 makes it the CMS of choice for developers. Today, I'll share one such specially-made method to add a custom field below apply a discount code in Magento 2 cart page.


With this solution, you can utilize the cart page when a consumer is about to complete their purchase for a number of different purposes.


The customer is now practically certain to convert and is hence confident in your brand. Why not demand more of them?


For instance, if you are providing a discount code, you may encourage the user to click on a custom field underneath the discount code and invite them to review the benefits of the deal in greater detail or to sign up for a premium membership to receive additional savings.


Additionally, at this stage, you can include a unique link that guides visitors to your best-selling products. By doing this, you can raise the average order value and improve sales.


Additionally, if you allow product customization, you can include a unique button so that customers can begin customizing the product if they haven't already. Enhance the Magento 2 store's customer experience in this way.


Get more here: https://meetanshi.com/blog/add-custom-field-below-apply-discount-code-in-magento-2-cart-page/


How to Add or Remove Price Filter in Magento 2 Layered Navigation

Searching for a strategy to Magento 2 layered navigation add or remove price filter  Peruse this master instructional exercise to figure out how to do that!

Customers’ convenience in finding the desired product can be a key to your online selling success. Quite often, the customer may be looking for a product within a specific price range in your store, and allowing them to filter the products based on that can significantly add to their experience on your Magento 2 store.

By default, Magento 2 (Adobe Commerce) comes with a layered navigation feature on the catalog page that enables customers to find products based on various filters such as price, category, color, and other attributes. The same can be customized or tweaked from the backend configuration in the admin panel.

For more information,visit : https://meetanshi.com/blog/add-or-remove-price-filter-in-magento-2-layered-navigation/


How to Add New Column in Magento 2 Quote Table & Order Table

Magento 2, regardless of how highlight rich, misses the mark with regards to meeting the profoundly tweaked prerequisites of clients. Luckily, the adaptable stage permits the engineers to alter the code to finish the clients' necessities!

Here, the customization that I'm talking about is to add new column in Magento 2 Quote table & Order table.It very well may be any section that isn't in the default Magento 2 statement table and request table, however the information from the data set is required to have been gotten in these tables.


Follow the underneath strategy and you get tweaked Magento 2 statement table and request table!


For more information,visit  : https://meetanshi.com/blog/add-new-column-in-magento-2-quote-table-order-table/


How to Add Custom Phtml File in Magento 2 Admin

Need to Add Custom Phtml File in Magento 2 Admin? This is the way you can do that.


In the event that you are a Magento designer dealing with custom turn of events, you may frequently expect to change the format of the administrator board for adding new highlights and functionalities. In Magento 2, Phtml records are utilized by the web servers to create dynamic HTML documents in view of the PHP scripts and serve them to the clients, for example store administrators and clients. Consequently, to change whatever is shown on the administrator board, we want to add a custom Phtml document in Magento 2 administrator.


Prior, one of my partners showed a strategy to call a Phtml record in CMS static block in Magento 2. Today, I have thought of a strategy to embed a custom Phtml document in your Magento 2 administrator board through a module.


For more information,visit : https://meetanshi.com/blog/add-custom-phtml-file-in-magento-2-admin/


Sunday, December 25, 2022

Solved: Undefined Index: DirectiveName in SimpleDirective.php in Magento 2

Is your Magento 2 store not working as expected when an email should be set off? Indeed, this can be a direct result of a custom email layout. Follow me till the finish of this post to track down the arrangement. 🎯


In Magento 2, different email notices are shipped off the clients and administrators for different exercises. The vendors can redo the email layouts as per their necessities. In some cases these custom email layouts can make similarity issues after Magento overhauls. As of late, I experienced one such issue in our client's Magento store, which was newly moved up to Magento 2.3.4.


Magento was tossing blunder 500 when the messages should be sent through custom formats, for example new client enrollment, reset client secret word, request achievement, and so on.


The blunder log showed: "Unclear File: DirectiveName in vendor\magento\framework\Filter\DirectiveProcessor\Simple Directive.php in Magento 2".


This is a result of the limitations on the utilization of custom factors in Magento 2.3.4 (Adobe Business). It very well may be effortlessly tackled by following the custom email format relocation guide delivered by Magento.


How about  Magento 2 Undefined Index: DirectiveName in SimpleDirective.php.


For more information ,  visit : https://meetanshi.com/blog/undefined-index-directivename-in-simpledirective-php-in-magento-2/


Solved: Error in Compat.php While Installing Magento 2

Hi Magento Peeps,


Coincidentally found a surprising error in compact.php while installing Magento 2? 


We take care of you, likely!


As of late, I was introducing Magento 2 with XAMPP on a Windows PC of one of my partners and experienced a surprising blunder. The blunder read:


In compat.php line 1927:


This isn't carried out, as it is unimaginable to expect to execute Argon2i with OK execution in unadulterated PHP.


On additional examination, I observed that the blunder was tossed by Magento on the grounds that specific PHP augmentations were absent.


Assuming you are likewise confronting such a mistake while introducing Magento 2, you can follow this blog entry to tackle the issue.


For more information, visit : https://meetanshi.com/blog/error-in-compat-php-while-installing-magento-2/


Thursday, December 22, 2022

How to Add or Change Favicon in Shopify


Could it be said that you are the person who likes to work while keeping numerous program tabs open? We feel you! 

Rather than perusing the name, clients can take a gander at the Favicon and get the piece of information about the brand character in regards to the page they're alluding to with their logo portrayal on the program tab.

In the event that you are thinking about how to add or change Favicon in Shopify; you are at the perfect location.

The Favicon is a little square picture. By and large, it is a more modest form of logo of the brand.

You ought to continuously go for Favicon that best addresses your business and develops your business. 

In the event that, you are thinking about Favicon to change or add in Shopify. you are at the perfect location.

Trust you find this blog entry valuable for how to add or change Favicon in Shopify. 

For more information,visit :

https://meetanshi.com/blog/how-to-add-or-change-favicon-in-shopify/


Wednesday, December 21, 2022

How to Add Color Picker in Magento 2 Admin Configuration

 You may need to give the admin total authority over the front-end user interface while implementing an extension. Changing the UI involves altering the background and text colors, necessitating the inclusion of a color picker in the Magento 2 admin configuration.


In a Magento 2 extension, the settings are typically found under Stores -> Configuration, and this is where you add the color picker to enable changing the color in the frontend user interface. Here, I'll share easy steps to add color picker Magento 2 Admin Configuration!


Clear the cache after that and then go to the store's configuration. It will show the color picker option. Anywhere in Magento 2 that needs it, use this color picker with your own customized code!


For more information, Visit: https://meetanshi.com/blog/add-color-picker-in-magento-2-admin-configuration/


How to Get Customer Collection in Magento 2

 This is the answer for Magento 2 developers who occasionally need a list of clients.


 Magento 2 gets customer collection using the following solution. When you need to build features depending on customers or their attributes, you can use this code.


For instance, you might wish to provide unique discount codes depending on client segments or first-time user discounts for visitors who still need to order from your website.


Another option is to apply a condition based on the user's first and last name, date of birth, gender, etc. You must first collect client data in Magento 2 each time you want to perform such customization.


Check out the answer to the same.

https://meetanshi.com/blog/get-customer-collection-in-magento-2/


Tuesday, December 20, 2022

How to Get Current Store ID in Magento 2

E-commerce has altered how consumers conduct business and shop. A customer from France could buy something from an Indian store via online purchasing! The store owners attempt to provide a shopping platform that is suitable for their customers' native language, currency, etc. as the client base grows.


Therefore, Magento 2 enables having many storefronts to provide your clients with a convenient buying experience.


The store owner must configure multi stores in Magento 2 in order to manage multiple stores from a single administration. The requirement to get the current store id Magento 2 frequently arises when working in a multi-store setting.


particularly when the retailer requires customization specific to the store. For instance, the currency and merchandise prices in store A differ from that in-store B.


You must first obtain the store ID before implementing any such condition-based modification. If the store ID is equal to one, do not display a popup of discounted items or create a store-specific CSV; otherwise, do so.


For more information, Visit: https://meetanshi.com/blog/get-current-store-id-in-magento-2/


How to Add Custom Field in Invoice Totals in Magento 2 Invoice Email

 An invoice is a formal record that contains information about a purchase in great detail, such as the quantity, price, shipping charges, sales tax, total, etc.


When a customer places an order and completes their payments, Magento 2 enables setting invoice emails to send them a comprehensive invoice.


A bill sent via email makes the transaction reliable and lawful while also enhancing your store's brand identity. Additionally, it's an interactive way to improve user experience and prevent any future legal difficulties.


There are numerous choices available in the invoice email in Magento 2 by default. What would happen, though, if you wanted to include a custom field in the invoice email?


For instance, you have increased the price for packing or product customization. It even provided a discount based on the value of the store credit. The sum is now computed taking into account these extra fees or reductions.


However, the email invoice does not automatically add custom charges.


If the grand total on the invoice email differs from the quantity they paid, it may cause confusion for the clients.


Consequently, one must adhere to the following procedure in order to display the manually added charges add a custom field in invoice totals Magento 2 invoice email.


For a detailed guide, Visit: https://meetanshi.com/blog/add-custom-field-in-invoice-totals-in-magento-2-invoice-email/ 


Get more of our update !